A sealed-looking box does not prove that a locking distal radius plate is sterile, undamaged or suitable for the planned fixation. Use the label, packaging, implant record and manufacturer’s IFU to control the plate from receipt through sterile-field transfer, and quarantine it when any safety or traceability detail is missing.
Key takeaways
- Store the plate in original packaging under the IFU’s stated conditions.
- Check sterility, expiry date, seals and every package layer before opening.
- Match plate size, side and screw system to the surgical plan.
- Record the implant’s lot or batch number before sterile transfer.
Receive and store the plate under controlled conditions
At receipt, move the locking distal radius plate into a clean, dry, temperature-controlled storage area and keep it in the manufacturer’s original protective packaging. Compare the label with the purchase record and read the implant’s instructions for use (IFU); those documents control its storage temperature, shelf life, sterile or non-sterile status, and processing requirements.
A sealed-looking box alone does not prove sterility.
Protect the implant with these controls:
- Keep the box off the floor and away from dust, chemicals, direct sunlight, excessive humidity, impact, and unauthorized handling.
- Do not place heavy instrument trays on the box or stack items where they could crush the package.
- Rotate stock by the manufacturer’s expiry or use-by date, following first-expiring, first-out practice.
- Retain the label and all available lot, batch, serial, catalogue, and unique device identification (UDI) information for the implant log, patient record, and recalls.
- Quarantine any package with a puncture, torn seal, moisture, crushing, or a missing label instead of returning it to stock.
During orthopaedic implant handling, use clean, appropriate instruments and avoid sharp clamps or forceps on the plate. Do not drop it onto a hard surface or drag it across a metal tray; scratches and dents can remove a visibly undamaged plate from service.
Keep the distal radius plate storage location separate from chemicals and uncontrolled traffic until the surgical team confirms it is needed.
Verify sterility status and inspect every package layer
Care for a locking distal radius plate before surgery begins with the label, not the carton. A sealed-looking box does not prove sterility. Confirm whether the plate is supplied sterile or non-sterile, check the stated sterilization method, and verify the expiration or use-by date where applicable. Read the manufacturer’s IFU before opening it.
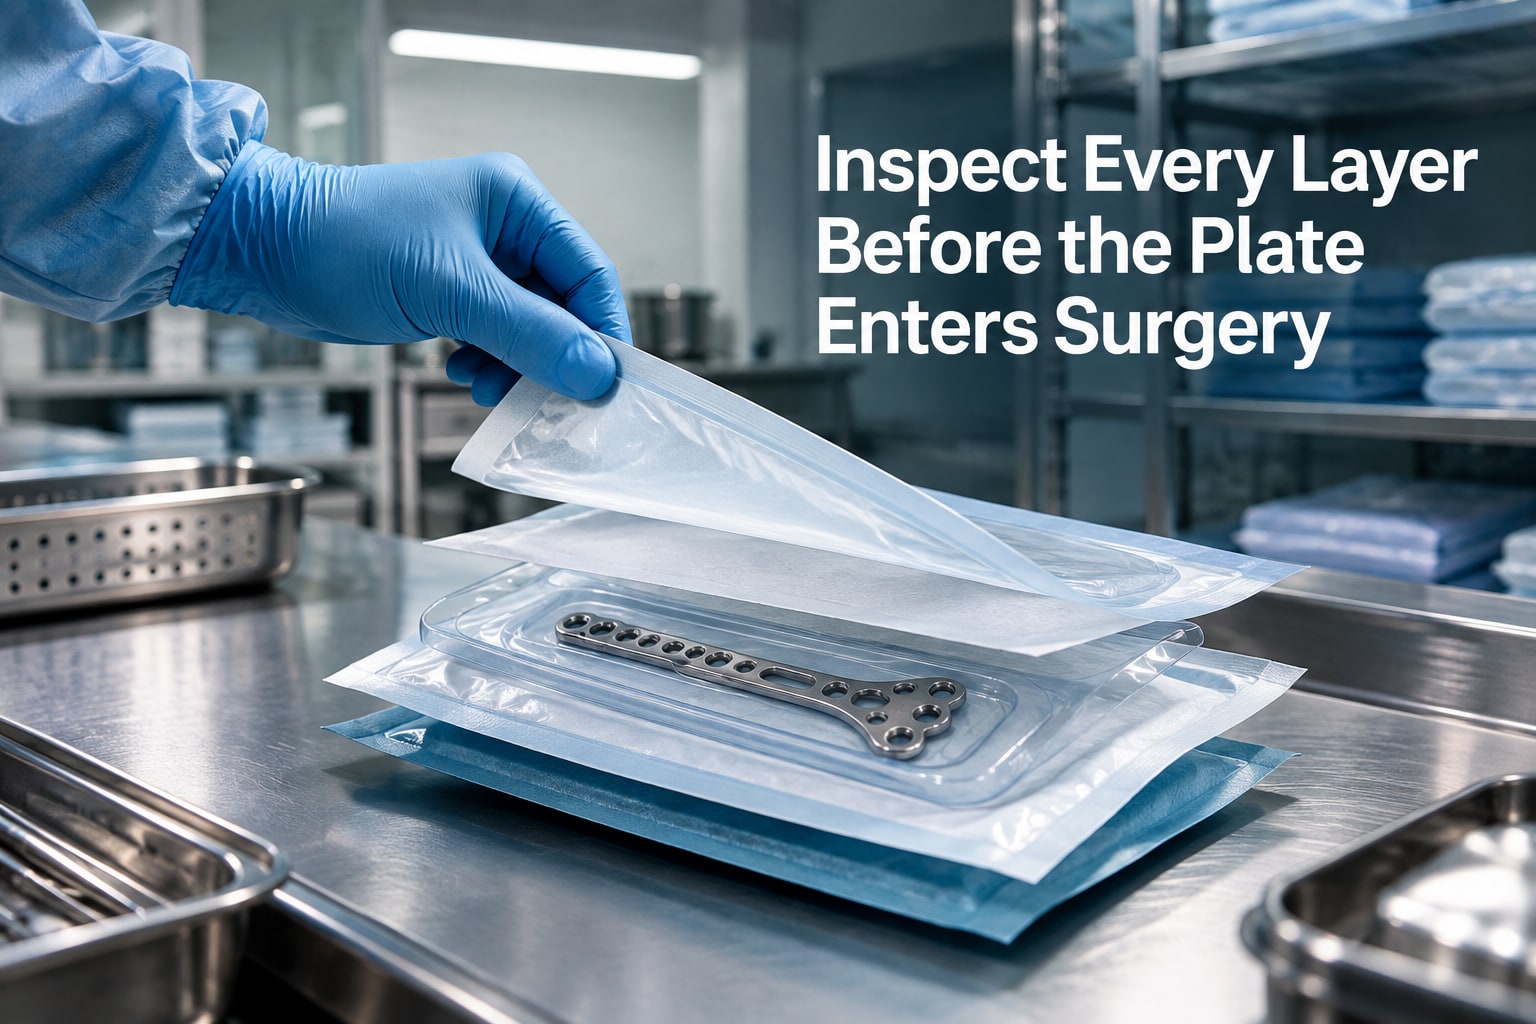
Inspect every package layer, from shipping carton to inner box, tray or pouch. Accept the implant only when the packaging is dry, intact, correctly labelled and within date.
- Quarantine any layer with a puncture, torn seal, hole, moisture, crushed area, broken closure or missing or illegible label.
- If the package was dropped, inspect an unopened unit for barrier damage; do not implant an exposed plate that contacted a nonsterile surface.
- Do not restore sterility by wiping the plate or using a quick, unvalidated cycle.
A non-sterile plate requires the manufacturer’s validated cleaning, packaging and sterilization process before implantation. A sterile, single-use plate must not be resterilized or reprocessed unless its IFU expressly permits it; titanium or stainless steel does not justify a generic cycle.
Distal radius plate storage and stock rotation must preserve the label for the patient record, implant log and recall tracing. Record:
- Lot or batch number
- Serial or catalogue number
- UDI, where provided
Keep these details available after opening.
Match the plate to the surgical plan before opening it
The surgeon must confirm the planned side, plate family and size against radiographic templating before anyone opens the sterile package. This is the decisive step in locking plate surgical preparation: a visually similar plate can fit the wrist yet fail to match the fracture, screw trajectory or operative plan.
| Implant detail | Confirm against the plan | What goes wrong if mismatched |
|---|---|---|
| Side | Left or right distal radius | The plate may not contour to the intended wrist |
| Configuration | Volar, dorsal, fragment-specific or other family | Screw directions and fracture support can change |
| Size | Length and number of shaft and distal holes | The plate may not span the fracture or fit available bone |
| Profile | Distal contour, shaft shape and hole position | A poor fit can leave prominence or inadequate reduction |
| Material | Titanium or stainless steel, as documented | The wrong implant can conflict with the planned system |
| Screw interface | Locking and non-locking screw diameters and lengths | A nominally similar screw may not lock correctly |
Compare the catalogue number, size and material on the label with the surgeon’s request and the templated image. Confirm that the package states sterile status, shows a valid use-by date where applicable, and has intact barriers; quarantine punctured, wet, crushed, torn or unidentified packaging.
As part of care for locking distal radius plate before surgery:
- Keep the plate, screws and instruments within the same documented system.
- Do not open several sizes “just in case”; opened implants follow facility and manufacturer policy, not automatic return to stock.
- Retain the lot, batch, catalogue and UDI information from the label for the implant record.
Confirm material, compatibility and instrument readiness
Confirm the material from the implant label, catalogue number and manufacturer’s instructions, not from colour or appearance. Titanium and stainless steel can look similar; a magnet is not a reliable identification method. Record the material and verify whether the plate is sterile or non-sterile.
Process a non-sterile plate only through the manufacturer’s validated cleaning, packaging and sterilization method. Do not resterilize a sterile, single-use plate unless its labeling expressly permits it.
1. Keep the plate, locking screws, non-locking screws, drill guides and drivers together as one controlled system. A matching screw diameter does not prove that another manufacturer’s locking interface will fit.
2. Before opening the plate, prepare the specified screwdriver, threaded drill guides, depth gauge, reduction tools and locking sleeves. Check each instrument against the same product family and surgical technique.
3. Confirm the side, plate length, hole count, distal profile, material and screw diameters against the operative plan. A visually similar plate from another system is not interchangeable.
4. Do not bend, twist, notch, cut or reshape the plate during locking plate surgical preparation. If the system permits contouring, use only its named bending tools and stated limits; deformation can alter screw trajectories and threaded holes.
5. During orthopaedic implant handling, use clean instruments rather than sharp clamps or forceps on the plate. Do not drop it or drag it across a metal tray.
Remove any plate with a scratch, dent or distorted locking hole from service, even when its packaging was intact. Forcing an incompatible driver or screw can damage the recess or thread before implantation.
Transfer the inspected plate to the sterile field and preserve traceability
The final handoff is a controlled transfer from an intact, verified package to the sterile field, with the implant identity preserved. During orthopaedic implant handling, do not place the plate on the field until the scrubbed team confirms the label, side, configuration and sterile barrier one last time.
1. The circulating nurse opens the outer packaging without touching the sterile contents, reads the implant label aloud, and gives the plate to the scrubbed person using aseptic technique. Do not drop, slide or force the plate through the opening.
2. Keep the plate, compatible screws and required instruments together as one controlled system. Confirm that the screwdriver, threaded guide, depth gauge and locking sleeves match the manufacturer’s system; forcing a mismatched driver can damage the recess or threaded hole.
3. Retain the label, peel-off sticker or electronic record showing catalogue number, lot or batch, serial number and UDI when available. Enter these details in the implant log and patient record before the package is discarded.
For stock supplied by Komal Health Care Pvt Ltd, retain the exact product label rather than relying on a generic supplier name.
4. Stop and quarantine the implant if the seal is broken, packaging is punctured, wet, crushed or unlabelled, or if the sterility status or use-by date cannot be confirmed. Mark it “DO NOT USE,” separate it from usable stock, record the defect and notify sterile processing, procurement and the manufacturer or distributor.
A non-sterile plate follows the hospital’s validated cleaning, packaging and sterilization process. Do not substitute a generic cycle or resterilize a sterile single-use plate unless its labeling expressly permits it; this is essential locking plate surgical preparation and safe care for locking distal radius plate before surgery.
Related products
 | Orthopedic Implants We Are The manufacturer Of Locking Distal Radius Plate . Size Is From 3/5 Holes & 5/5 Holes in Right & Left Sides , Given Products Are Manufactured... View product → |
 | Orthopedic Implants Locking Distal Radius Plate , Extra - Articular We Are Manufacturer Of Locking Distal Radius Plate , Extra - Articular . Size Is 3/5Holes , 5/4Holes & 5/5Holes , In Left & Right Sides . View product → |
Frequently asked questions
How should you store a locking distal radius plate before surgery?
Move it to a clean, dry, temperature-controlled area and keep it in the manufacturer’s original protective packaging. Follow the storage temperature and shelf-life limits in the IFU.
How do you verify a plate’s sterility before surgery?
Read the label for sterile or non-sterile status, expiry date and processing instructions. Inspect the outer package, inner sterile barrier and seal for damage, moisture or tampering.
What should you match before opening the distal radius plate?
Match the plate’s side, size, shape and hole configuration with the surgical plan, imaging and selected screw system. Confirm that the required implant is available before breaking the sterile seal.
What instrument checks are needed for locking plate preparation?
Confirm that the compatible drill guides, drills, depth gauge, screwdriver, torque-limiting device and other required instruments are present, clean, functional and processed as specified in the IFU.
How do you preserve traceability when transferring the plate?
Record the implant name, size, material, lot or batch number and expiry date before opening or transferring it. Pass the intact sterile inner package to the sterile field without touching its contents.