A missing broach, incompatible trial head, damaged reamer or wet sterile pack can interrupt total hip replacement after the patient is already prepared. By the end, you will know how to identify these failures early, match the tray to the planned hip implants, and build a backup process that protects operating-room time.
Key takeaways
- Check every broach, reamer, trial head, impactor, and locking pin before surgery.
- Match tray contents with the planned implant system, sizes, and surgical approach.
- Quarantine damaged, unidentified, unsterile, or incomplete instruments before the case.
- Keep a verified backup tray for instruments that could interrupt the procedure.
What Counts as a THR Instrument Set Problem?
A THR instrument set problem is any omission, mismatch, damage, identification failure, or packaging failure that makes the set incomplete or unsafe for the planned step. Counting the tray as present proves little: a missing trial head, broach, reamer, impactor, or locking pin can halt the next surgical stage.
1. Reconcile the set against its count sheet, tray configuration, planned implant family, sizes, and surgical approach. Missing or misplaced instruments, wrong sizes, duplicate components, poor labels, unreadable barcodes, and instruments stored in the wrong sequence are inventory or control failures.
They become workflow defects when they block femoral preparation, acetabular preparation, trial reduction, or component insertion.
2. Inspect each working surface and connection. Dull acetabular reamers, damaged broach teeth, bent guides, loose impactor interfaces, worn tapers, and unreliable locking features can make preparation inaccurate or insertion uncontrolled, even when every item is present.
3. Confirm that broaches, trial necks, trial heads, reamers, cup impactors, and liner impactors belong to the planned system. A physically fitting component can still create an invalid trial construct; do not mix systems unless the manufacturer’s instructions for use permit it.
4. Reject a wet, torn, punctured, or otherwise compromised sterile pack. Moisture inside or outside the wrapper can compromise sterility, so quarantine and reprocess it under facility policy.
These are the failures behind THR instrument set problems: an inventory discrepancy is inconvenient, but a missing or defective instrument can change the planned implant, delay surgery, or make safe continuation impossible.
Where Set Failures Interrupt the Total Hip Replacement Sequence
A missing locking pin can stop a total hip replacement even when the tray appears full. THR instrument set problems become costly when discovery occurs after anaesthesia: staff may borrow another tray, repeat sterilization, change the planned implant or postpone the case.
1. Before the patient enters, open the sterile pack and reconcile the set-specific count sheet with the tray photograph and barcode. Inspect broaches, reamers, trial heads and necks, impactors, extraction tools, alignment guides and handles. Check cutting surfaces, depth markings, locking mechanisms and taper interfaces for wear, damage or looseness.
2. Expose the femoral instruments and confirm the required broach sizes, handles and extraction tools. A missing broach, bent guide or worn tooth can prevent controlled preparation, forcing a different stem, another tray or an extended anaesthesia time.
3. Prepare the acetabulum with the specified reamers, cup impactor and liner impactor. A dull reamer or incompatible impactor can compromise preparation or stop insertion until supplementary instruments arrive.
4. During trial reduction, verify every trial head, neck and offset required to assess leg length and stability. A missing small trial component can force an intraoperative implant change rather than a safe comparison.
5. Before final insertion, confirm the locking pin, final-component impactors and extraction tools. Loose interfaces or incorrect depth markings can delay seating and create uncontrolled force.
6. During closure, account for every instrument and confirm no item remains in the field. Missing instruments discovered after the count can trigger a search, imaging or case delay.
7. Test powered reamers, handpieces, batteries and sterile attachments before the patient enters. An absent, expired or uncharged battery makes a complete-looking set unusable.
How to Match the Tray to the Planned Hip Implants
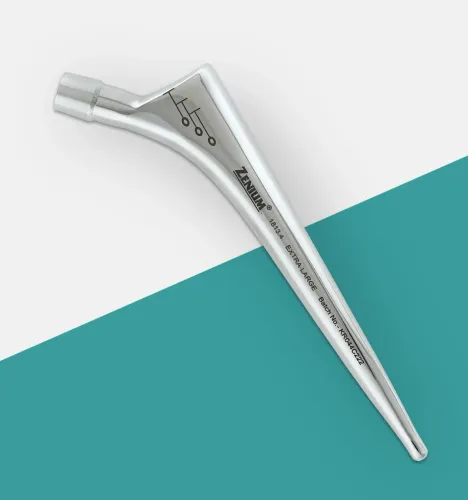
Match the tray by implant system and planned construct, not by instrument names alone. A sharp broach can still be wrong for the selected stem, while a trial head that fits physically may not reproduce the final hip implants’ leg length, offset or stability.
1. Confirm the implant family and stem geometry. Match the broach or rasp design, size progression, femoral handle and extraction tools to the stem’s shape and the planned cemented or uncemented technique.
2. Check acetabular compatibility. Verify cup sizes, acetabular reamer diameters, cup impactor, liner sizes and liner inserter against the manufacturer’s size chart.
3. Match the trial construct. Confirm trial neck offsets, head diameters, head lengths and taper dimensions. A trial component must represent the planned final combination, not merely attach to the handle.
4. Verify laterality and approach-specific components. Check left or right markings, offset orientation, alignment guides and any instruments required for the planned surgical approach.
5. Read the implant and instrument instructions for use. Use only the listed broaches, reamers, impactors, trial heads, necks and locking interfaces; do not infer compatibility from similar dimensions.
6. Keep manufacturers’ systems separate unless documented compatibility covers the exact combination. Mixing components can create an incorrect taper, unstable trial reduction or an implant–instrument interface that the IFU does not permit.
Record missing sizes as a compatibility failure, not only an inventory defect. The THR instrument set must include alternatives needed after trial reduction, because changing stem size, head diameter, offset or cup size can otherwise stop the case.
How to Find an Incomplete or Unusable Set Before the Case
Reject the set before the patient enters the operating room if you cannot prove that every required item is present, identifiable, clean, dry and compatible. A tray count alone misses a modular insert, trial component or locking pin stored elsewhere.
- Reconcile the THR instrument set’s count sheet against every tray, insert and sterilizer load. Compare the physical contents with current tray photographs, then verify labels, set identifiers and barcodes.
- Inspect the sterile pack for wetness, torn wrapping, broken seals, damaged containers and incorrect tray configuration. Confirm backup broaches, reamers, trial heads, impactors, handles and extraction tools.
- Test powered equipment, cables, foot controls and batteries before dispatch to theatre. A dead battery discovered during preparation can halt the next step.
- Stop the set if soil remains in box locks, serrations, cannulations or lumens, or if instruments are wet, overloaded or assembled contrary to their instructions for use. Check that staff disassembled components, opened hinges, brushed or flushed lumens, used the specified detergent and dried everything before packaging.
| Finding | Decision | Consequence |
|---|---|---|
| Missing or mismatched component | Quarantine and obtain the correct item or replacement set | Do not improvise with another implant system |
| Damaged tip, locking mechanism or depth marking | Remove from service and document the defect | Femoral or acetabular preparation may become inaccurate |
| Late loaner, absent documentation or unclear barcode | Escalate to the vendor, operating room and sterile-processing department | Technical arrival does not make the set case-ready |
Do not treat immediate-use steam sterilization as a scheduling fix. Use it only for a specific urgent need under the device, container and sterilizer IFUs; it is not a substitute for adequate inventory, cleaning time or complete documentation.
Choosing a Dedicated Tray and Building a Backup Plan
Choose a dedicated total hip replacement tray when your THR implant family, surgical approaches and revision needs justify its footprint. A generic orthopaedic set saves storage space but increases the risk of missing a broach, trial head, liner inserter or cup-positioning guide.
Modular trays reduce duplicate instruments, yet a missing insert or locking pin can create THR instrument set problems even when the main tray is present.
| Option | Main advantage | Main trade-off |
|---|---|---|
| Dedicated THR tray | Complete, system-matched workflow with simpler traceability | More storage space and sterilizer capacity; infrequently used sizes remain on hand |
| Generic orthopaedic set | Lower inventory and broad use | Greater compatibility and completeness risk; weaker revision access |
| Modular trays | Flexible configuration and fewer duplicate instruments | Split locations and loads increase reconciliation failures |
| Separate backup tray | Immediate access to uncommon sizes or revision tools | Extra processing, storage, maintenance and tracking costs |
Before purchasing, ask the supplier for:
- An instrument-to-implant compatibility matrix covering stem geometry, cup and liner sizes, head diameters, offsets, tapers, laterality, and cemented or uncemented technique.
- Current instrument and implant instructions for use, tray photographs, set-specific count sheets and preventive-maintenance criteria.
- Loaner-set responsibilities, delivery and inspection deadlines, implant-label traceability, and replacement timelines.
- Maximum tray load, packaging and sterilization parameters stated in the applicable IFUs.
Komal Health Care Pvt Ltd can help evaluate documented compatibility and supply continuity for hip implants and related components, while your clinical, sterile-processing and procurement teams retain approval control.
Frequently asked questions
What counts as a THR instrument set problem?
A problem includes a missing or mismatched instrument, damaged component, failed identification mark, or packaging failure that makes the set incomplete or unsafe for the planned step.
Where can a THR instrument set failure interrupt total hip replacement?
A missing broach, reamer, trial head, impactor, or locking pin can stop the sequence when that instrument is needed for preparation, trialling, or implant insertion.
How do you match a tray to the planned hip implants?
Compare the tray’s instrument system, implant family, sizes, trials, and approach-specific components with the planned THR implants before the case.
How do you find an incomplete or unusable set before surgery?
Open the inventory against the set list, inspect instruments for damage and readable identification, and check packaging integrity and sterility status.
What should a backup plan for a THR instrument set include?
Use a verified backup tray or confirmed replacement instruments for critical steps, and resolve missing or unsuitable components before the patient enters the operating room.